Camping in Style

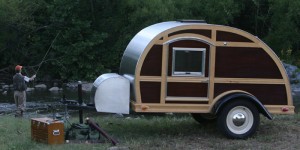
Silver Tears CampersThis is not a terribly rustic way to go into the woods, but it is very cool. A craftsman in Roanoke, VA, came up with this  gorgeous teardrop pull-behind camper that is nostalgic and luxurious at the same time.

Take one look at this baby and you’ll see that this camper’s daddy was a furniture maker and designer. The form is the same as the classics of the 40’s but the exterior is mahogany and ash, giving a “woodie” persona. The interior appointments maintain the family character and make camping anything but roughin’ it. The base cost of one of these babies? Just $16,500.

Check out their web site at Silver Tears Campers.
Built-in Bathroom Shelves

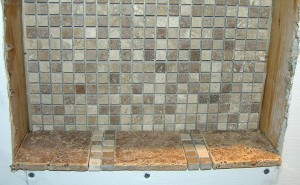
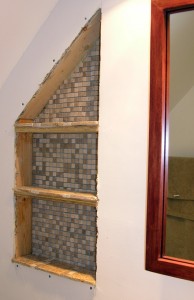
Unfinished built-in shelves

In a small bathroom space is at a premium. Recently I replaced a vanity and counter-top  that ran the length of a bath with a European-style, shallow-profile vanity. At that time, a new light fixture and a re-framed medicine chest were added.

While those improvements were needed, the reduction in counter and under-sink storage space were a problem. So, built-in shelves were next.

Finding the studs was the first step. A standard stud-finder worked like a charm and from there I could measure out the 16″ centers and start taking out the drywall within the selected space. (interior space between studs is normally 14.5″ unless you have an unpredictable old home or a nutty contractor built the wall)

Once the drywall was punched out using a flat-head screwdriver and a hammer (most efficient way I have found), a couple shelves of 3/4″ plywood were cut and  inserted. Friction plus some wood glue made for a good tight and permanent fit.

Built-in shelves, close-up

I used some left-over 4 x4 stone tile ($5/sq ft) for the main part of the shelf tops and some smaller squared sheets ($10/sq ft) for shelf accents and  the back of the shelves. After tan grout is worked into the cracks the shelf under sides and frame will be completed with poplar stained to match the mirror frame.

Showhouse press

Birmingham Symphony Decorator Showhouse cabinetFrom AL.com:
Decorators ShowHouse revisits a manor

“The children’s playroom, decorated by students at Virginia College, is a woodland wonderland. The wooden stage, topped with an arbor, is trimmed with river rocks and features a chalkboard background “so they can change the scenery,” says instructor Ginny Aday. One corner of the playful, angular room features a hand-painted tree, trimmed with fairies, while another is outfitted with a custom-built banquette, which is upholstered with a brown-tweed fabric and topped with robin’s egg blue pillows.”

No mention of my piece, but it may not have been delivered yet. I got it in just under the wire.

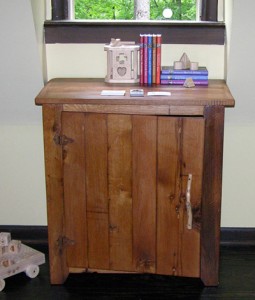
Cabinet- It is finished!

cabinet-finished-1Delivery tomorrow to the showhouse. Finish was still a bit tacky, but by morning it should be fine. I applied a coat of paste wax over the satin polyurethane to dull the finish even more. No time to add much in the way of peeled wood accents, but did add a natural twig handle. Hinges are rusty iron and there is a hidden door catch. I am pleased and hope the interior designer will be too.

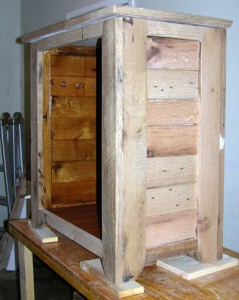
Cabinet in Progress

Cabinet with interior finishWith the deadline looming, I have been working like crazy on the cabinet for the Birmingham Symphony Decorator Showhouse. This weekend I got everything assembled except the door. I even started to put on the finish before I remembered to take more pictures. I had already applied stain (Olde Maple) to the interior of the cabinet in this picture.
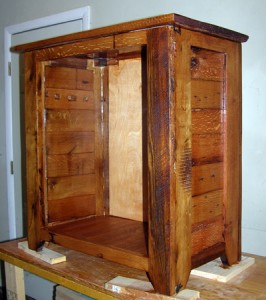
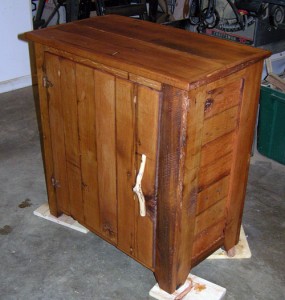
At first I wasn’t too sure about the final result, but after covering the entire piece with one coat, I am very pleased. The finish looks very natural but has an aged feeling to it that compliments the origin (barn timbers) and rustic character of the raw wood. I have not decided about a second coat. I am leaning toward a coat of paste wax.

What remains is to mount the door and, if possible, apply some fall peeled wood accents to the door. I had originally thought I would trim out the top with  the peeled wood, but it is very difficult to get straight cuts on naturally curved wood without a band saw. That may be my next purchase. Applying some accents may or may not work out. More on that later.
Cabinet with finish

The compound miter saw came in handy on this project and I finally laid to rest my Porter Cable orbital sander. It died after a very useful and productive life. I replaced it with a Black and Decker Palm Grip Sander after trying out the newer model of the Porter Cable  sander. Did not care for it and returned it the same day. The B&D is very nice and feels great in the hands due some gel inserts in the multiple handles. Bonus: It was also on sale for only $34. The PC model I returned was $59. Gotta love that.