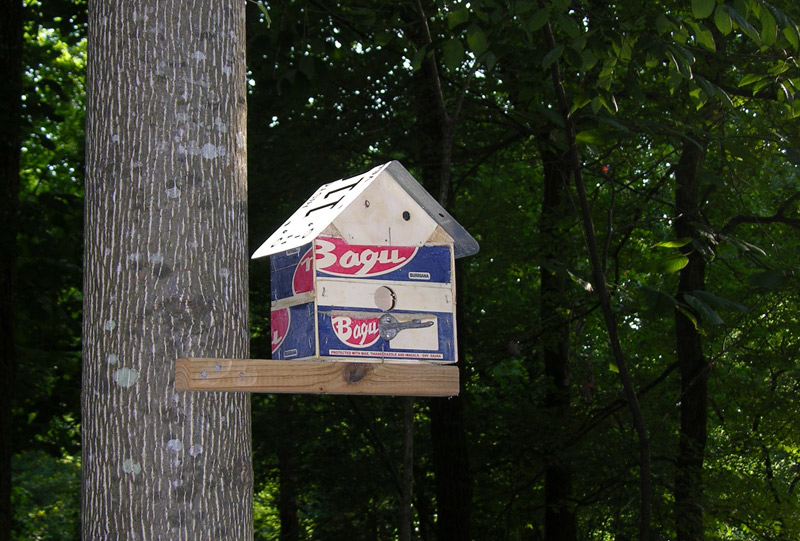
Clementine Crate Birdhouse

Clementines make winter seem shorter and they are very tasty. I go through a bunch of them when they are in season. So, I had several of clementine crates sitting around that I could not throw away. What to do with them? Hmmmm.

A birdhouse, yeah, that’s it. Can’t say if a house made out of these light wood crates will last in the weather, but it is worth a try. With a sturdy roof made out of an old license plate, they just might.

I used a power saw to cut the crates because I have one, but a hand saw or even an Exacto knife might work to cut the thin plywood. The corner pillar pieces are used at length, so there is no cutting required. An electric drill is also helpful in this project.

The slideshow below shows the major steps to assembling a birdhouse from these raw materials. If you have questions, just leave a comment or email me.


On the question of what to use for a perch: it is up to you. I used an old cabinet pull on one example and a coat hanger on the one shown in the slideshow. This is where you can get creative. Use whatever you like. I would suggest you keep it light because the plywood of the crates is thin.

To finish or not to finish: I used a single coat of polyurethane finish on the outside of this birdhouse because I had some leftover and I thought it might help weatherize the structure a bit. For your creation, it is your call.

Finally, if you should try to do this at home, I would love to see pictures of your creations. Send me a picture or connect with me on Pinterest, Facebook, or Twitter to share.
Busy in the Kitchen

Green Kitchen Remodel

So, lately I have been lax in building anything in the workshop that was not part of improvements to my house. It has been months, but I hope to get back to furniture soon.

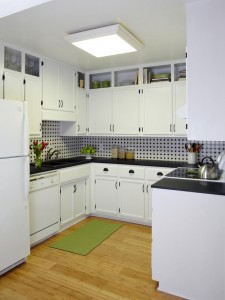
Over the past year I have redone my kitchen from a ’70s tragedy to a lighter, greener, retro-modern workspace. The change was significant enough that a writer friend pitched the story to HGTV. They liked it enough to send a stylist and photographer and the resultant story was published to HGTVRemodels.com. The piece, “A Kitchen Crafted for the Eco-Friendly”, features really great shots of my kitchen redo. Note: they stretched the main photo horizontally making me look a bit wider than normal. Not happy about it!

This project included plumbing, flooring, cabinetry, counter-tops, tile, electrical, and lots of painting. Some of it was a bit intimidating, but nothing was so daunting that it couldn’t be tackled if broken down into smaller pieces.

The anchors were a granite composite sink I found marked down at a box store and a very green counter-top material made of plastic and recycled paper that the manufacturer compared to Bakelight. It is a cool product that can be cut and milled very similar to wood. I found it handles much like hard maple.

Other hooks that sold the story were probably the low budget, the do-it-myself angle, and the before pictures I had taken during the process. The stylist did a great job of giving me better kitchen equipment than I actually have. I am proud that she liked my cafe table and chairs and left them in the shoot. The photographer made everything look great and my friend the writer caught the essence of what I was trying to do. A great experience!

Built-in Shelves Finished

Finished the built-in shelves a while ago but forgot to post a pic and details since last post on the process. [The trouble with digital media storage is that it is easy to forget what pictures you have on the card.]

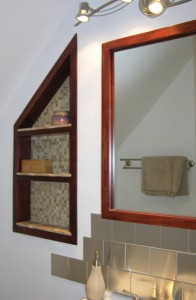
I framed the exterior of the shelves with stained ¼” x 2″ poplar lumber purchased at Lowes. The stain was the same red hickory used on the mirror frame followed by sealing with satin polyurethane. Cutting the angles was a bit difficult but the obscurities of my college trig class finally came in handy.

The back-splash is an easy to use product from Improvements (#337192, $27)—aluminum metal wall tiles. They are advertised as “will not crack, chip, or stain” and easy to install. The later—I can confirm—installation was so simple!

Each box of tiles contains 48 4 x 4 tiles and double adhesive foam for affixing  the tiles. The tiles come in almond, aluminum, black, white, chrome or copper and in triangle shaped to spice up your design.

Built-in Bathroom Shelves

Unfinished built-in shelves

In a small bathroom space is at a premium. Recently I replaced a vanity and counter-top  that ran the length of a bath with a European-style, shallow-profile vanity. At that time, a new light fixture and a re-framed medicine chest were added.

While those improvements were needed, the reduction in counter and under-sink storage space were a problem. So, built-in shelves were next.

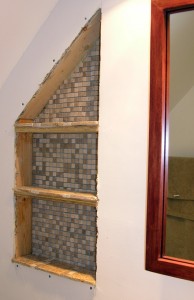
Finding the studs was the first step. A standard stud-finder worked like a charm and from there I could measure out the 16″ centers and start taking out the drywall within the selected space. (interior space between studs is normally 14.5″ unless you have an unpredictable old home or a nutty contractor built the wall)

Once the drywall was punched out using a flat-head screwdriver and a hammer (most efficient way I have found), a couple shelves of 3/4″ plywood were cut and  inserted. Friction plus some wood glue made for a good tight and permanent fit.

Built-in shelves, close-up

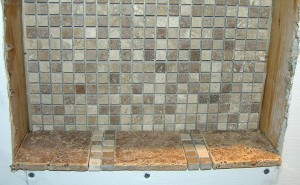
I used some left-over 4 x4 stone tile ($5/sq ft) for the main part of the shelf tops and some smaller squared sheets ($10/sq ft) for shelf accents and  the back of the shelves. After tan grout is worked into the cracks the shelf under sides and frame will be completed with poplar stained to match the mirror frame.

Cabinet- It is finished!

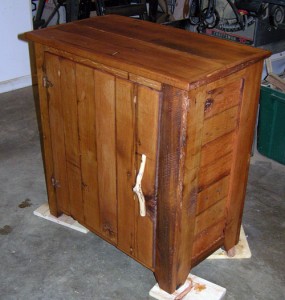
cabinet-finished-1Delivery tomorrow to the showhouse. Finish was still a bit tacky, but by morning it should be fine. I applied a coat of paste wax over the satin polyurethane to dull the finish even more. No time to add much in the way of peeled wood accents, but did add a natural twig handle. Hinges are rusty iron and there is a hidden door catch. I am pleased and hope the interior designer will be too.